This article applies as of PRTG 24
| Note: You can also connect PRTG SLA Reporter and PRTG Data Exporter to your PRTG installation for customized service level and process level overviews, and for central alerting. For more information see PRTG SLA Reporter and PRTG Data Exporter. |
In ITOps Board, you can connect several PRTG installations for a central dashboard view, for customized service level and process level overviews, and for central alerting.
For installing ITOps Board, see the ITOps Board Installation Guide. You can download all necessary installation files here.
To use ITOps Board, you need to add a dedicated user account to your PRTG installations to which ITOps Board can connect.
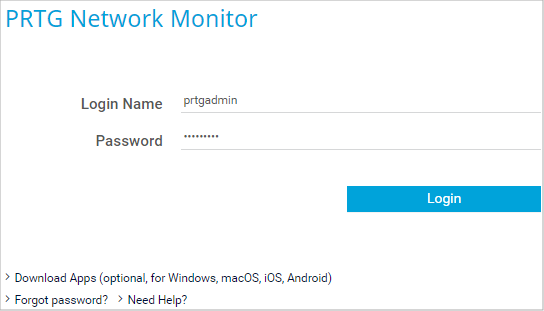
1. Log in to the PRTG web interface as an administrator user. The default login name and password for the PRTG System Administrator user are prtgadmin and prtgadmin.

Click to enlarge.
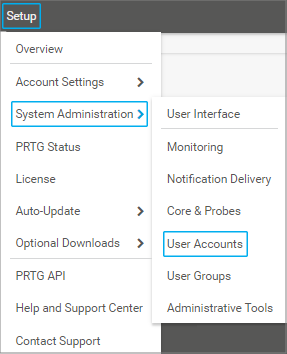
2. Select Setup | System Administration | User Accounts from the main menu bar.

Click to enlarge
3. Hover over  Click to enlarge and select Add User from the dropdown menu.
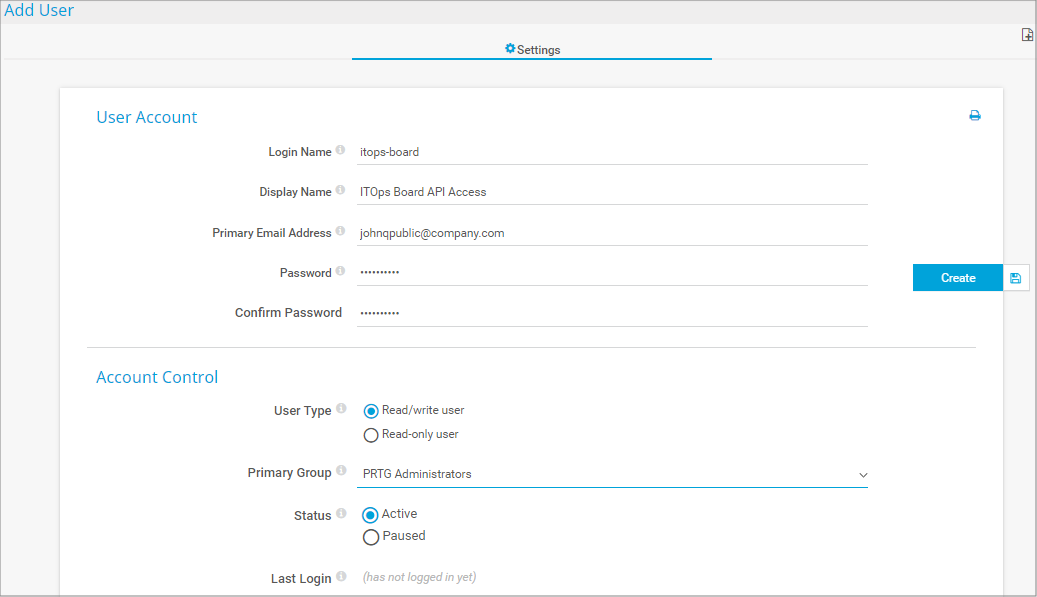
4. Enter a Login Name for the new user, for example, itopsboard, and a Display Name, for example, ITOps Board API Access.
5. Enter a primary email address and a password for the new user.
6. For Account Type, select Read/write user.
7. As the new user’s Primary Group, select the PRTG Administrators group from the dropdown list.
Note: This is necessary because the new user needs to be an administrator user. You can also select any other user group with administrative rights.
8. Set all other options as you require them.
9. Click Create to add the new user account to PRTG.

Click to enlarge
For more information on how to manage user accounts in PRTG, see the PRTG Manual: User Accounts and User Groups.
Yasodhara Das [Paessler Support]
Yasodhara Das [Paessler Support]


Add comment