I am using Sigfox and want to monitor geolocation with PRTG. How can I do this?
1 Reply
Votes:
0
This article applies as of PRTG 22
Monitoring Sigfox geolocation with PRTG
| Important notice: This article describes how to manually create Sigfox callbacks and decode the respective payload data. If you want to decode Sigfox payloads in a much faster and easier way, try out Paessler BitDecoder. |
Sigfox Geolocation is a low-energy location service for devices that are equipped with a Sigfox module, without the need for GPS. For each message sent by a device, Sigfox Geolocation provides real-time coordinates and the location within a few hundred meters up to a kilometer, delivered through a callback, for example.
With PRTG, you can monitor Sigfox devices with the HTTP IoT Push Data Advanced sensor.
Create an HTTP IoT Push Data Advanced sensor
The first step to monitoring Sigfox Geolocation is to add an HTTP IoT Push Data Advanced sensor to your PRTG installation.
- Create a new device or use an existing device and enter 127.0.0.1 as the IPv4 Address/DNS Name.
- Add an HTTP IoT Push Data Advanced sensor to the device.
- Note the TLS Port 5051 and the Identification Token, you need both values when setting up your Sigfox callback configuration, so copy them.
Create a Sigfox callback
The next step to monitoring Sigfox Geolocation is to create the corresponding callback in the Sigfox interface.
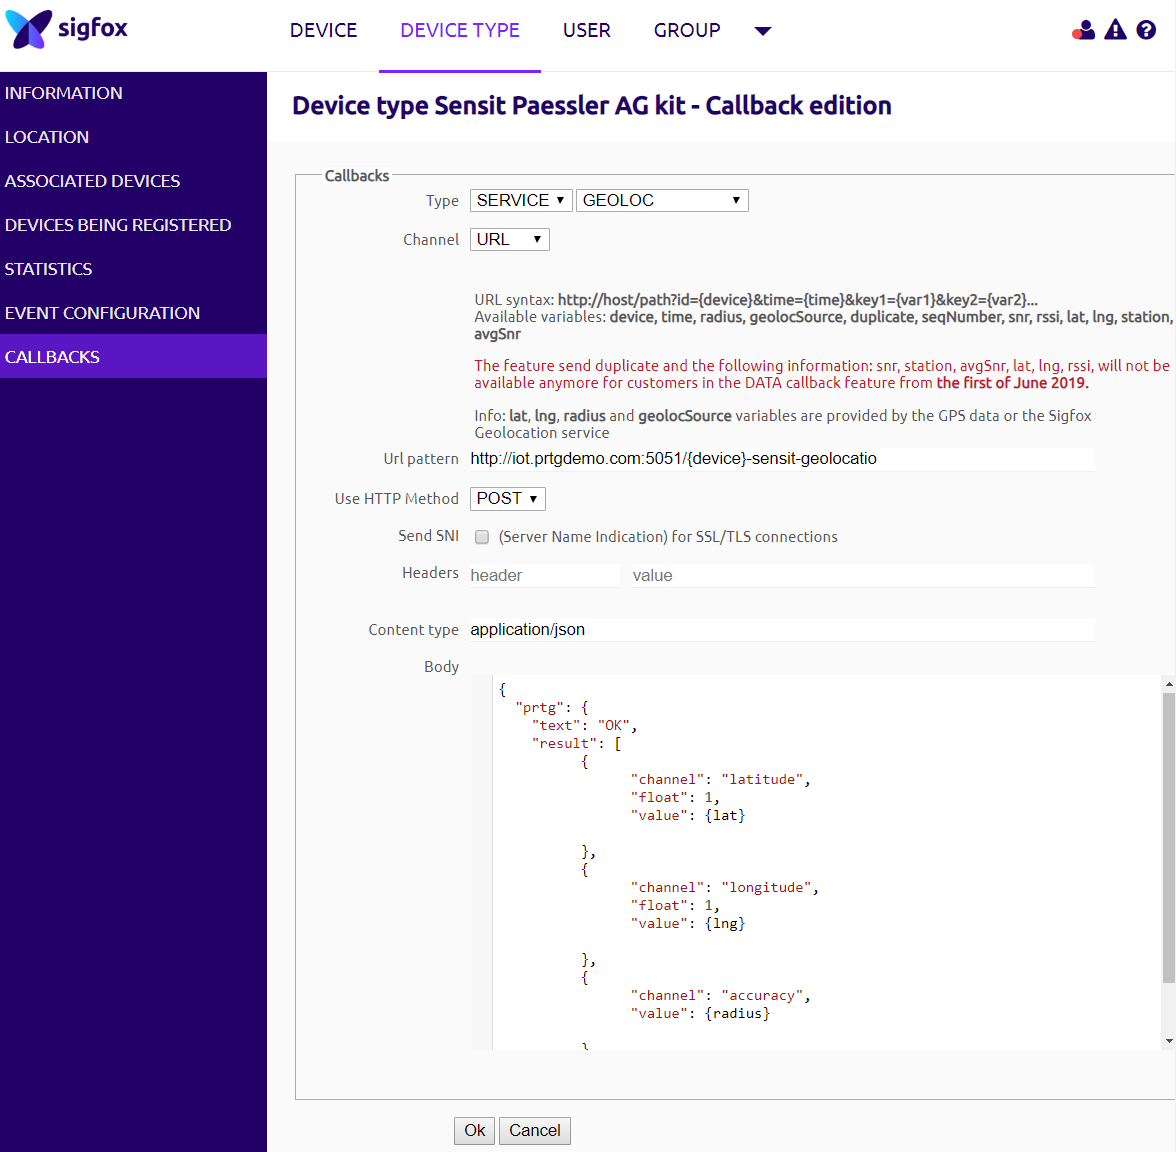
- Open Callbacks.
- Select the Device Type tab.
- Under Type, select Service and Geoloc.
- Under Channel, select URL and enter the following URL.
https://<probe_IP>:5051/<token>Note: You can reference the Sigfox Id as {device} in your <token>.
- Replace <probe_IP> with the IP address of the probe system where the HTTP IoT Push Data Advanced sensor runs.
- Replace <token> with the Identification Token that you defined in the sensor settings.
- Change the Content type to application/json
- Add the following JSON to the Body field
{
  "prtg": {
    "text": "OK",
    "result": [
          {
                "channel": "Latitude",
            	"float": 1,
                "value": {lat}

          },
          {
                "channel": "Longitude",
            	"float": 1,
                "value": {lng}

          },
          {
                "channel": "Accuracy",
                "value": {radius}

          }
    ]
  }
}
9. Click Ok to save the callback.
Device settings in PRTG
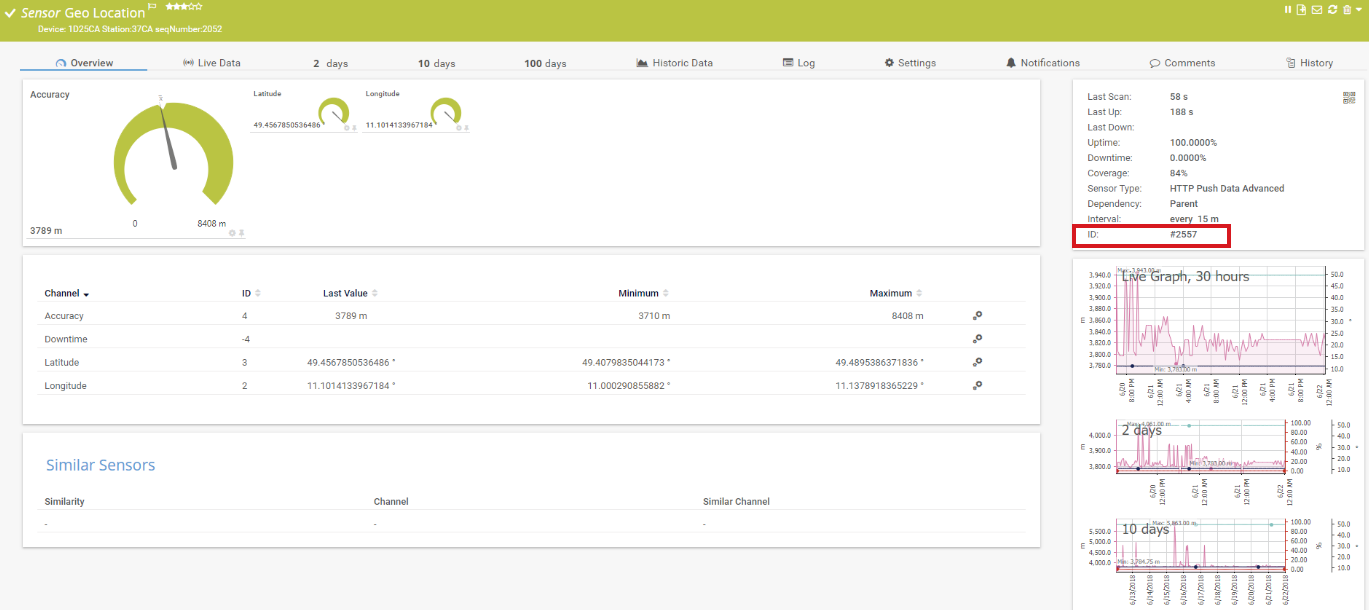
- Copy the ID of the HTTP IoT Push Data Advanced sensor. In this example, it is 2557.

Click to enlarge.
- In section Location of the settings of the device to which you added the sensor, disable the inheritance of settings.
- Enter the following under Location (for Geo Maps):
SigfoxTest{"id":<sensorid>,"count":1,"waypointstyle":null,"waypointmarker":2,"style":{"strokeColor":"#0404B4","strokeOpacity":0.0,"strokeWidth":4,"fillColor":"#0000ff","fillOpacity":0.1}}
- Replace <sensorid> with the sensor's ID, which is 2557 in this example.
- Save your settings.
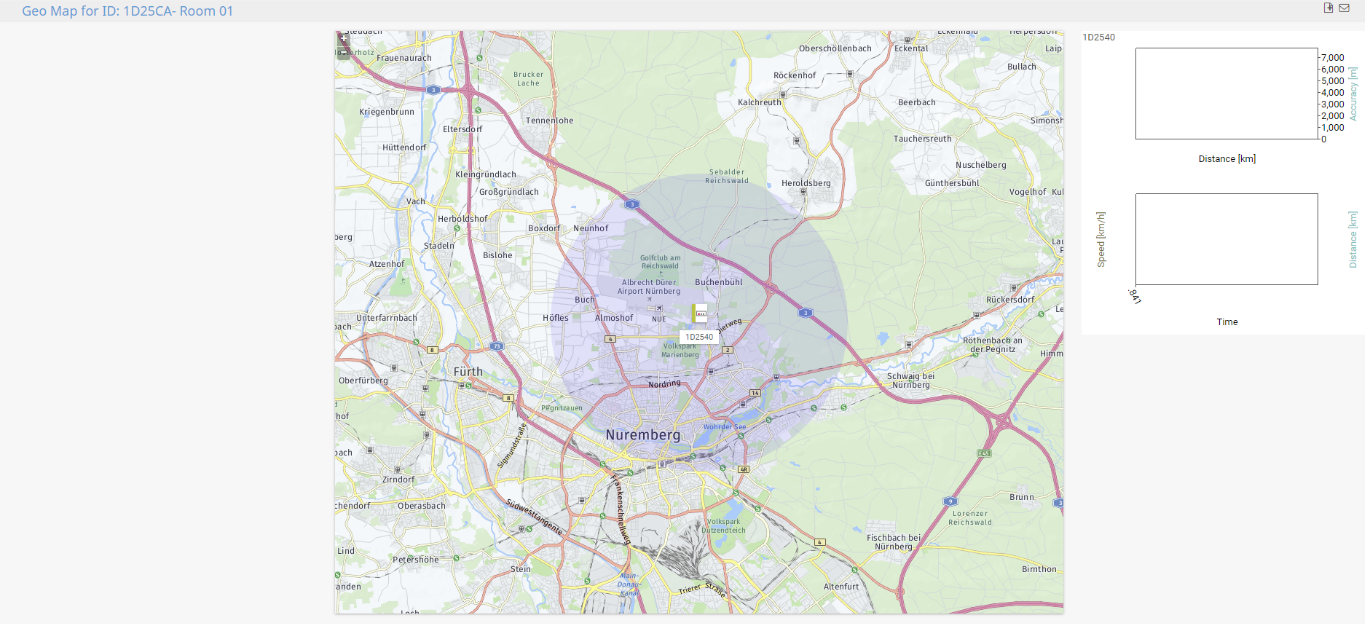
The geographical map now shows the Sigfox Geolocation, including the expected radius in which the device is located.

Click to enlarge.
More
Created on Jun 28, 2018 11:47:28 AM by
Brandy Greger [Paessler Support]
Last change on Jan 5, 2023 7:57:45 AM by
Brandy Greger [Paessler Support]

Add comment