PRTG can send notifications but it does not track these notifications to make sure that they are received and resolved. Is it therefore possible to integrate Derdack Enterprise Alert into PRTG? What steps do I have to take?
1 Reply
Votes:
0
This article applies as of PRTG 21
Integration of Derdack Enterprise Alert into PRTG
Derdack Enterprise Alert is an alerting solution that offers multiple notification channels and multiple escalation tiers to make sure that alerts, in this case notifications from PRTG, are received, acknowledged, and resolved. You can integrate Enterprise Alert into PRTG via emails, the REST API, and webhooks. In this article, you can read about the integration via email and the REST API.
Option 1: Integration via email
Configure PRTG
- Log in to the PRTG web interface.
- Select Setup | Account Settings | Notification Templates from the main menu.
- Hover over the plus button on the right side and click Add Notification Template.

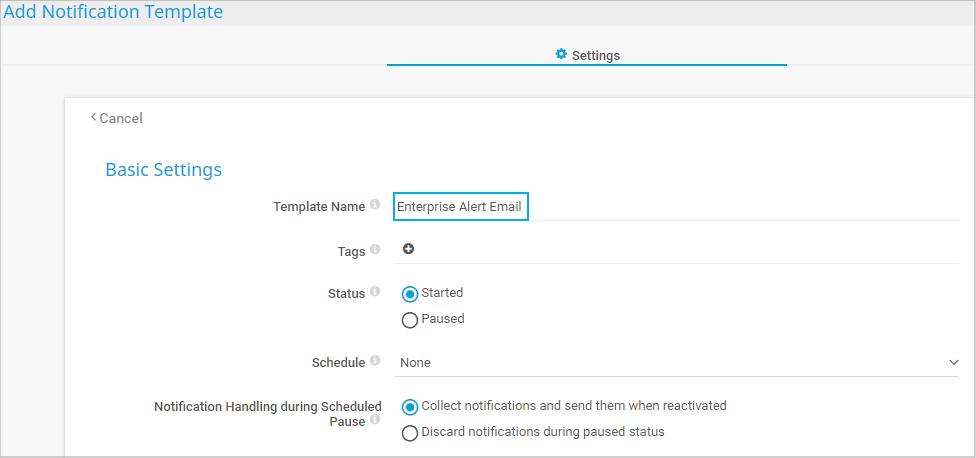
Click to enlarge. - Enter a Template Name, for example, Enterprise Alert Email.
Click to enlarge. - Scroll down to the notification methods and enable the method Send Email. Then do the following:
- Set the Sender option to Custom.
- Enter a Sender Email Address. This is the email address that appears in the From field of the email.
- Enter a Sender Name, for example, PRTG Network Monitor.
- In the Send to Email Address field, enter the email address that you set up in Enterprise Alert.
- Leave the Format setting as it is unless the system cannot read HTML. In this case, select Text.
- You can leave all other settings unchanged.
- Click Create.

Click to enlarge.
- Navigate to the sensor that you want to create a notification for in case of an alarm.
- Select the Notification Triggers tab.
- Hover over the plus button on the right side and select Add State Trigger.

Click to enlarge. - Configure the state trigger according to your needs. Make sure that you set the previously configured notification template Enterprise Alert Email as the action for the first two conditions.

Click to enlarge. - Click the blue check mark to save your settings.
Configure Enterprise Alert
- Log in to the Enterprise Alert portal.
- Create a new event.
- On the General tab, give the sensor a Name to identify it.
- As Event Source, select Incoming Messages | E-mail from the dropdown menu.
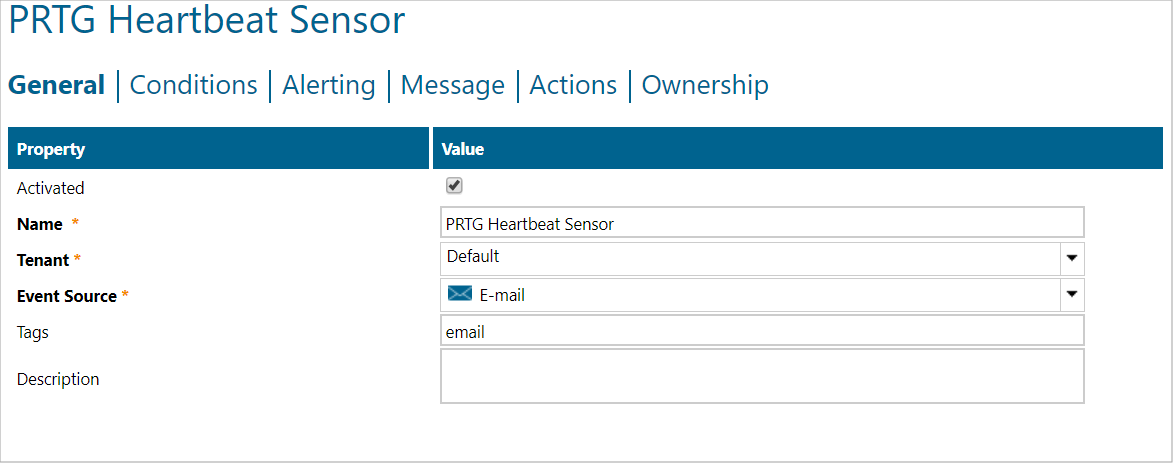
Click to enlarge. - Click Next.
- On the Conditions tab, add conditions to set Enterprise Alert to only activate if it receives an email of the type that you previously created.

Click to enlarge. - Click Next.
- On the Alerting tab, select the Destination, that is, the users or the teams that Enterprise Alert needs to alert.
- Define the respective Notification Channel for each user or team.

Click to enlarge. - Click Next.
- On the Message tab, you can configure the alert message that Enterprise Alert sends to a user or team. Enter a subject and a body. You can also use dynamic content that forwards information from PRTG such as Subject, Text, and Originator Address.
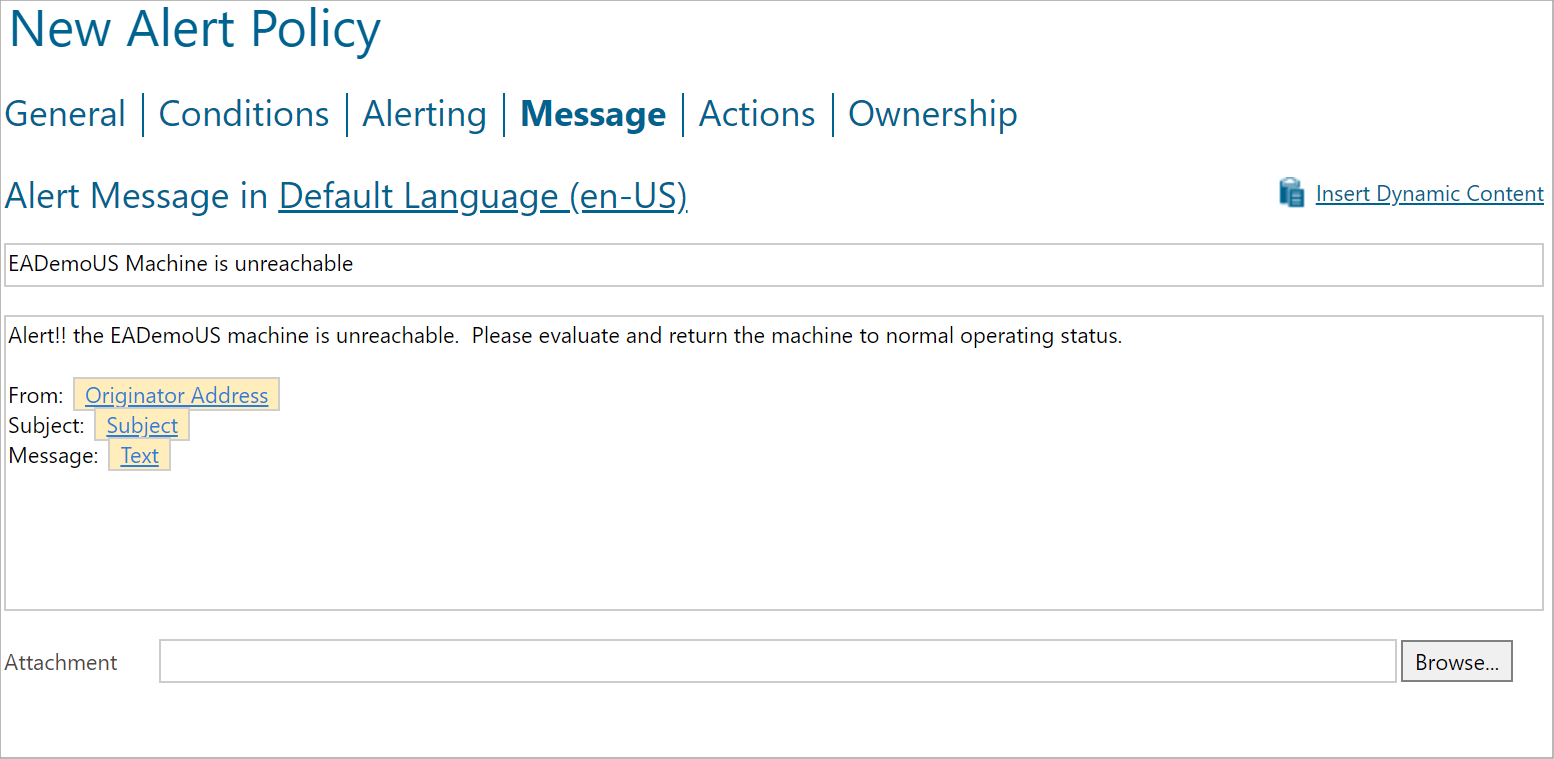
Click to enlarge. - Click Save.
Option 2: Integration via the REST API
While the integration via email is quite straightforward because the corresponding actions already exist, for the integration via REST API, you have to take some preparatory steps.
Preparation
- Create a new REST API event source. For more information on how to do this, see https://www.derdack.com/portfolio_item/webhook-rest-api-mobile-app-text-push-voice-scheduling/.
- Create the PowerShell scripts with which Enterprise Alert can raise and, optionally, resolve alarms.
PowerShell script to raise an alert:
param(
[string]$sensor,
[string]$sensorid,
[string]$date,
[string]$status,
[string]$message,
[string]$device,
[string]$since,
[string]$lastup,
[string]$sensorURL,
[string]$deviceURL,
[string]$serviceURL
)
$body = ConvertTo-Json @{
Sensor = "$sensor"
SensorID = "$sensorid"
date = "$date"
Status = "$status"
Message = "$message"
Device = "$device"
Since = "$Since"
Lastup = "$lastup"
SensorURL = "$sensorURL"
DeviceURL = "$deviceURL"
ManagementURL = "$serviceURL"
ExternalID ="$sensorid"
}
$uriEA9 = https:///EAWebService/rest/events?apiKey=<apiKey>"
Invoke-RestMethod -Method POST -ContentType "application/json" -body "$body" -Uri "$uriEA9"
exit 0;
Note: Replace <apiKey> with the according API key of the new REST API event source.
Optional: PowerShell script to resolve an alert:
param(
[string]$sensor,
[string]$sensorid,
[string]$date,
[string]$status,
[string]$message,
[string]$device,
[string]$since,
[string]$lastup,
[string]$sensorURL,
[string]$deviceURL,
[string]$serviceURL
)
$body = ConvertTo-Json @{
Sensor = "$sensor"
SensorID = "$sensorid"
date = "$date"
Status = "$status"
Message = "$message"
Device = "$device"
Since = "$Since"
Lastup = "$lastup"
SensorURL = "$sensorURL"
DeviceURL = "$deviceURL"
ManagementURL = "$serviceURL"
ExternalID ="$sensorid"
}
$uriEA9 = https:///eawebservice/rest/events/$sensorid/reset?apiKey=<apiKey>"
Invoke-RestMethod -Method POST -ContentType "application/json" -body "$body" -Uri "$uriEA9"
exit 0;
Note: Replace <apiKey> with the according API key of the new REST API event source.
Optional: Configure Derdack Enterprise Alert
If you want to use the option to resolve an alert, you need to configure an external ID mapping.
- Log in to the Enterprise Alert portal and navigate to the REST endpoint.
- Map the ExternalID parameter to the ExternalID.
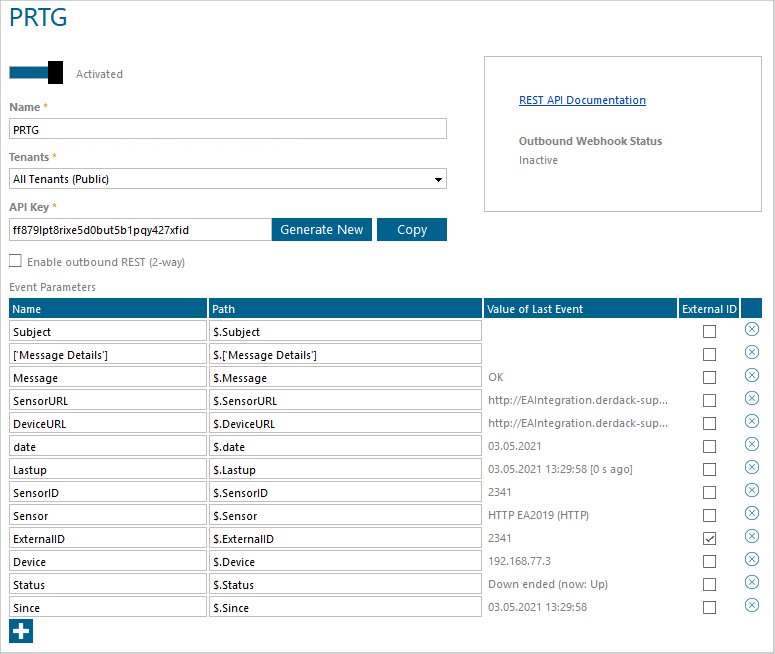
Click to enlarge.
Configure PRTG
- Log in to the PRTG web interface.
- Select Setup | Account Settings | Notification Templates from the main menu.
- Hover over the plus button on the right side and click Add Notification Template.

Click to enlarge. - Enter a Template Name, for example, REST Enterprise Alert Notification.
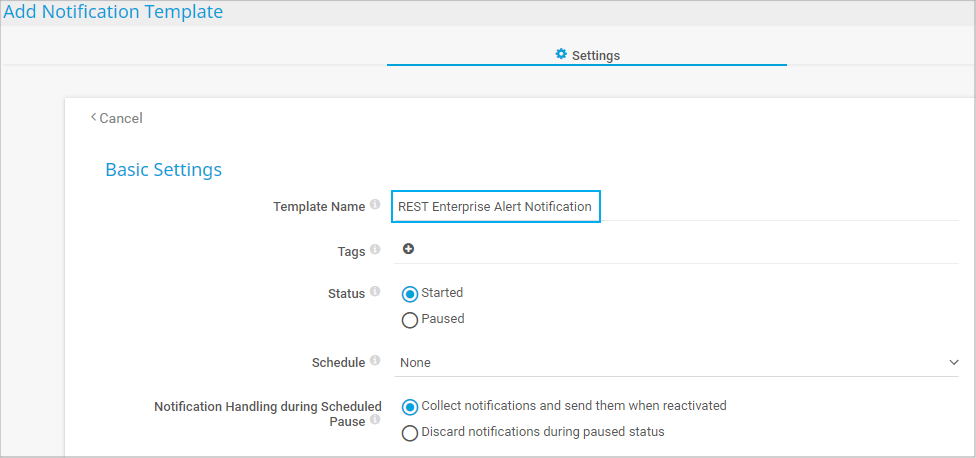
Click to enlarge. - Scroll down to the notification methods and enable the method Execute Program. Then do the following:
- As Executable File, select the PowerShell script that you previously created.
- In the Parameter field, enter the following:
-sensor '%sensor' -sensorID '%sensorid' -date '%date' -status '%status' -message '%message' -since '%since' -lastup '%lastup' -device '%device' -sensorURL '%linksensor' -deviceURL '%linkdevice' -serviceURL '%serviceurl'For more information about available placeholders, see also the PRTG Manual: List of Placeholders for Notifications. - Leave all other settings as they are and click Create.
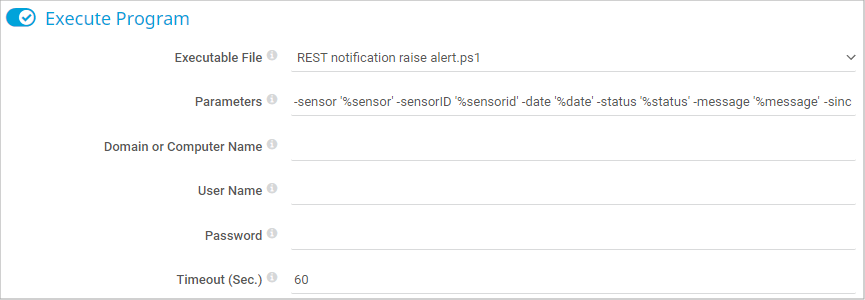
Click to enlarge.
- Optional: If you want to use the option to resolve an alert, repeat the previous steps and create a second notification template. As Executable File, select the PowerShell script that you created for an alert resolution.
- Navigate to the sensor that you want to create a notification for in case of an alarm.
- Select the Notification Triggers tab.
- Hover over the plus button on the right side and select Add State Trigger.

Click to enlarge. - Configure the state trigger according to your needs. Make sure that you set the previously configured notification template REST Enterprise Alert Notification as the action for the first condition and, optionally, the notification template for the alert resolution as the action for the last condition.

Click to enlarge. - Click the blue check mark to save your settings.
More
Created on May 7, 2021 7:48:48 AM by
Maike Guba [Paessler Support]
(2,404)
●2
●1
Last change on Jan 9, 2023 8:12:55 AM by
Jacqueline Conforti [Paessler Support]
Add comment