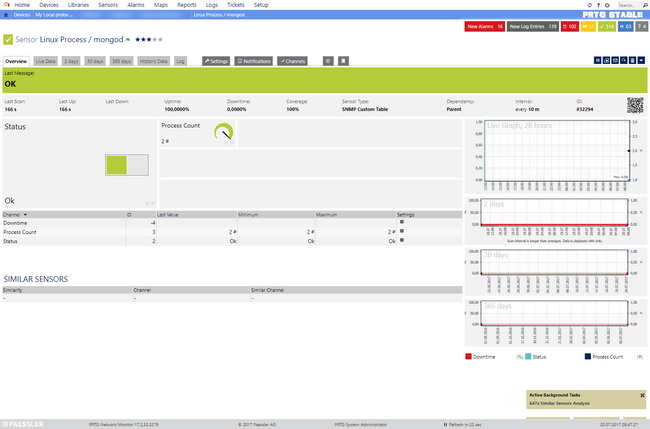
This article applies to PRTG Network Monitor 9 or later
Monitoring Running Processes in Linux
Prerequisites
- Installed and configured NET-SNMP
In some cases it might be useful to monitor if (and how often) a process on a Linux system is running at the moment. This can be done via SNMP, but therefore you need to apply some modification to your system's SNMP configuration.
SNMP Configuration (on device)
- Open your "snmpd.conf" file in a text editor and navigate to the end of the file.
- Add the following:
proc <process name>
- Replace <process name> with the name of the desired process
- IMPORTANT: It has to be exact the same name as in your process list. It might be necessary to use the process name as given in the sbin or bin directory.
- Run the command /bin/ps -e to get the process name to use.
- Restart your SNMP service to make the changes take effect.
Automatic Sensor creation with Device Template
This device template will poll the following:
- Process
- Status (prErrorFlag)
- Count
It will use the status for alerting by default. You can however define additional limits for the "Process Count" channel. The usage of the device templates makes the deployment of sensors easier, especially if there are several devices or processes that you would like to monitor.

Device template deployment and Usage
- Download the required zip archive here.
- Extract the archive to your PRTG program directory. By default, this is %Program Files (x86)%\PRTG Network Monitor\.
- In PRTG, restart the core server: open Setup | System Administration | Administrative Tools | Restart Core Server and click Go!. This ensures that the MIB and lookups are loaded before you run the auto-discovery.
- Create a new device in PRTG with the address (IP or FQDN) of the device that you want to monitor and configure the SNMP credentials accordingly.
- Right-click your new device, select Run Auto Discovery with Template, and select the Custom UCD-SNMP Linux Process v0.x from the list.
Note: Using the auto-discovery with a dedicated device template is convenient here because it automates the creation of the custom sensors in an organized fashion.
- The sensors are deployed after a couple of seconds.
- You can adjust the channel limits or lookups to your needs later.
Template Version History
| 0.1 | Initial Release |
| 0.2 | Fixed the snmp_prTable check |
Manual Sensor creation
You can also deploy the sensor's manually if you don't want to use the auto-discovery. Please proceed as follows:
- Open the PRTG web interface
- Add the device you want to monitor
- Add a new SNMP Library sensor, then choose Basic Linux Library
- The process, from the step above, will be shown somehow like this:
| MIB Module | Category | Name |
|---|
| Basic Linux Library (UCD-SNMP-MIB) | Processes: 1 | Processes Index |
| Basic Linux Library (UCD-SNMP-MIB) | Processes: 1 | Processes Count |
| Basic Linux Library (UCD-SNMP-MIB) | Processes: 1 | Processes Error Flag |
Select the value you want to monitor (Example: "Processes Count" shows how often the process is running) and click on Continue
- Go to sensor's Settings tab and rename the sensor to match your process
If you want to add another process just follow the steps above, the new process will be in category "Processes: 2", and so on.
Basically this is how to monitor your processes on a Linux machine.
This has been tested on Ubuntu, but should also work for every other distribution using NET-SNMP.
Note: This is also possible using our Custom Table Sensor, and it will allow for better naming of sensors and improved Auto-Discovery support. Tip: The Table's OID is 1.3.6.1.4.1.2021.2.
See Also
Konstantin Wolff [Paessler Support]
Luciano Lingnau [Paessler]

Add comment